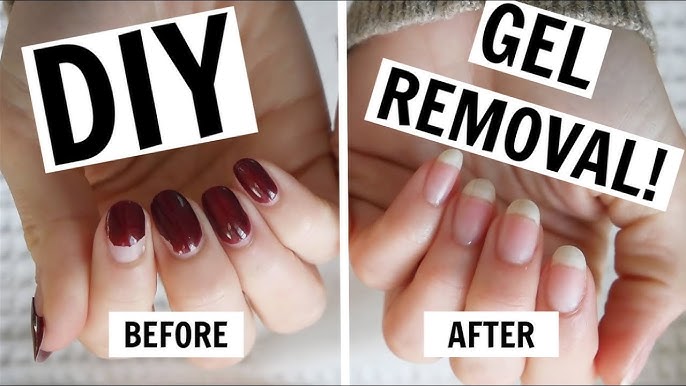
How to Remove Gel Nail Polish Safely and Easily
Gel nail polish gives you those flawless, long-lasting nails we all love. But removing it at home? That can feel daunting. Removing it the wrong way can damage your natural nails. With a few simple steps and the right tools, you can remove gel nail polish without leaving your nails dry, weak, or brittle. Here's how you can do it safely while maintaining the health of your nails.
Why Proper Gel Nail Polish Removal Matters
When it comes to gel nail polish, its durability is a blessing—but also a challenge when it's time to remove it. Peeling or picking at gel polish can strip away layers of your natural nail, leading to weakened nails and discomfort. The best way to avoid nail damage is by using the proper removal techniques that not only protect your nails but also help them stay strong and healthy.
What You’ll Need for Safe Gel Nail Polish Removal
- Acetone: Pure acetone works best for breaking down the polish.
- Cotton Balls or Pads: These will soak up the acetone.
- Aluminum Foil: Foil helps hold the acetone-soaked cotton against the nail.
- Cuticle Pusher or Orange Stick: To gently scrape off softened polish.
- Nail File: To roughen the top layer of the gel polish.
- Moisturizing Oil or Cuticle Cream: To keep nails hydrated post-removal.
These are essential items that ensure you're safely removing the gel nail polish without causing damage to your nails.
Step-by-Step Guide to Removing Gel Nail Polish
Step 1: Buff the Surface of Your Gel Polish
Before using acetone, lightly file the top layer of the gel nail polish to break its seal. This helps the acetone penetrate the polish more effectively, speeding up the removal process. Use a gentle hand to avoid damaging your natural nails beneath the polish.
Step 2: Soak Cotton Balls in Acetone
Pour a small amount of acetone onto cotton balls or pads, ensuring they’re well-saturated but not dripping. Acetone is key for breaking down the gel polish, and it works best when kept directly against the nail for an extended time.
Step 3: Wrap Nails with Foil
Place the soaked cotton balls on your nails and wrap each finger with aluminum foil. The foil keeps the acetone in place and prevents it from evaporating. Let your nails soak in the acetone for about 15-20 minutes.
Step 4: Gently Push Off the Polish
After soaking, remove the foil and gently use a cuticle pusher to slide off the softened polish. Don’t force it—if it doesn’t come off easily, reapply the acetone and foil and soak for a few more minutes. Forcing the polish off can damage your nails, which is why patience is essential during this step.
Step 5: Buff and Hydrate Your Nails
Once all the gel is removed, lightly buff your nails to smooth out any rough edges. Follow up with a generous application of nail oil or cuticle cream to rehydrate your nails, which may be slightly dry after using acetone.
>>> Read more: https://pronails.store/what-does-white-nail-polish-mean-p14
Common Mistakes to Avoid When Removing Gel Nail Polish
Peeling Off the Gel
It can be tempting to peel off gel polish as it begins to chip, but this can severely damage your natural nail by peeling off the top layers along with the polish. It weakens the nail, making it prone to breakage.
Not Moisturizing After Removal
The acetone used in gel removal is drying to both nails and cuticles. After removal, always hydrate with cuticle oil or a good quality hand cream to restore moisture.
Using Non-Acetone Removers
Non-acetone polish removers may not be strong enough to break down the gel nail polish, leading to a longer, less effective removal process. Pure acetone is essential for an efficient and safe process.
How to Maintain Healthy Nails After Gel Polish Removal
Even with the best removal methods, your nails may still feel a bit dry after using acetone. To ensure your nails stay healthy and strong, follow these aftercare tips:
Moisturize with Cuticle Oil
Cuticle oil nourishes the area around your nails and helps to restore moisture that was lost during the removal process. Apply it daily for the best results.
Strengthen Nails with a Nail Hardener
Using a nail hardener can help rebuild the structure of your nails after the removal of gel nail polish. Look for formulas that include keratin or calcium, as these ingredients help strengthen and protect weak nails.
Give Your Nails a Break
Frequent gel manicures can take a toll on your nails, so it’s a good idea to take breaks between applications to allow your nails to recover. Use these breaks to moisturize and strengthen your nails.
>>> Click now:https://pronails.store/pedicure-essential-foot-care-relaxation-at-pro-nails-p15
Use a Gentle Buffer
Instead of using a harsh file, opt for a gentle buffer to smooth the surface of your nails after gel polish removal. This will reduce the risk of further damage while keeping your nails looking polished.
How Professional Removal Can Help
If you don’t feel comfortable removing your gel nail polish at home, visiting a professional nail salon like Pro Nails can ensure the job is done safely and efficiently. At Pro Nails, our technicians use professional-grade products and techniques to remove gel polish with minimal impact on your natural nails. Plus, we’ll ensure your nails are properly cared for after the removal process, leaving them strong and healthy.
Conclusion
Removing gel nail polish can be a safe and easy process if done correctly. With a little patience and the right tools, you can protect your natural nails from damage and keep them strong and healthy. Whether you prefer DIY removal or letting the professionals at Pro Nails take care of it, understanding the process is key to maintaining beautiful nails.
